This post may contain affiliate links. Please read our disclosure policy.
My homemade Basil Pesto Recipe is made with just a handful of ingredients. Pesto Genovese or classic basil pesto is perfect to make with fresh basil!

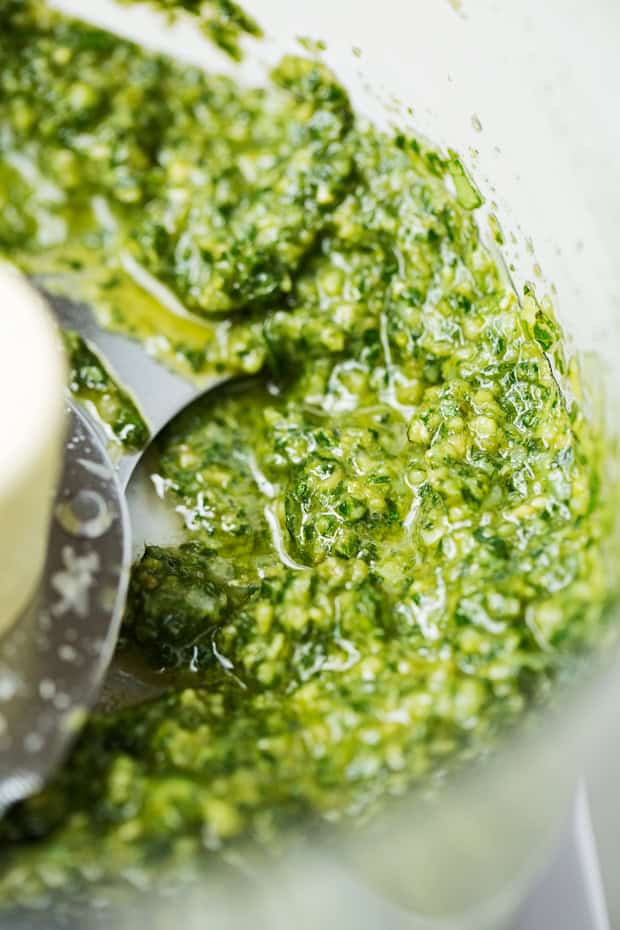
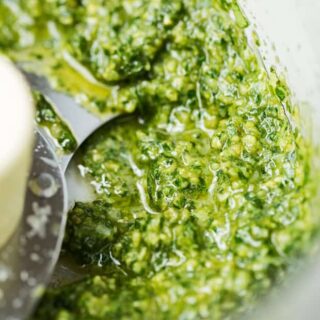
Homemade basil pesto.
It sounds a lot more complicated than it truly is. But it’s so easy to make at home and it has the most incredible flavor.
We’re talking less than 10 ingredients and a food processor.
That’s it.
That’s all you need to make a perfect pesto at home. So there’s actually no need to buy basil pesto at the grocery stores for $5 a jar. You can make it at home with fresh basil leaves from the store, or if you’re lucky, you might even have an abundance from your garden in the summertime.
Use it as a spread on sandwiches, over roasted vegetables, for a vinaigrette for a fresh peas salad, fold it into some pasta salad, roast it with tomatoes for my mozzarella pesto baked chicken recipe, or as a topping on my breakfast pizza. You could even add a dollop to your homemade minestrone soup right before serving. It’s absolutely sensational.
I love making pesto at home so much, that I’ve even make a spinach version of it with pecorino romano and walnuts.
This was really simple to make and was absolutely delicious! I will make it every week from now on. The addition of the lemon and zest resulted in truly awesome flavour! Thanks so much!

Ingredients for homemade basil pesto
- Fresh Basil Leaves: I like touse traditional Italian basil to make homemade pesto. But you could use varieties of basil, like Thai Basil for a different taste. You can also play around with the herbs, swap some of parsley, or even cilantro if you’d like.
- Grated Parmesan Cheese: Freshly grated parmesan cheese, you could also use pecorino Romano.
- Garlic: I use two whole cloves, but feel free to adjust to your taste.
- Lemon Zest: adds freshness to the Pesto Genovese.
- Pine Nuts: for those with a pine nut allergy, you could use almonds, pistachios, sunflower seeds, or pumpkin seeds (pepitas) To make a nut-free pesto, use hemp seeds instead.
- Lemon Juice: adds a touch of acid to cut through the rich flavor of olive oil.
- Extra Virgin Olive Oil: use the good quality stuff here! Especially if you’re using this for a caprese salad of something!
- Add-ins and Red Pepper Flakes: Is totally optional but I like to add abut to give it some heat. You could also use black pepper here instead. You might need a pinch of kosher salt as well, but really it just depends on how salty the cheese is that you use in the recipe.
How to make pesto genovese
- Store it. Store your pesto in a small container in the fridge. Press down to help reduce air pockets. You can store this in the fridge for 1 week.
- Load it up. Add the basil leaves, parmesan cheese, garlic, lemon zest, pine nuts, lemon juice, and red pepper flakes into the food processor.
- Blitz it. Pulse the food processor to help bread down the ingredients. Drizzle in the olive oil. Blend until the oil helps emulsify the ingredients into a chunky sauce-like consistency.
- Stop and taste. Taste the pesto using some crusty bread. Then adjust with additional garlic, salt or parmesan as desired to preference.
FAQs about this recipe
Some recipes call for blanching the basil to maintain better color, but I find this to be an additional step that’s not really necessary.
Pop tablespoons of pesto into ice cube trays and freeze. That way you have plenty to stir into any dish that you like.
You can use a blender or make it like they do in the Genoa region of Italy – in a mortar and pestle. This honestly gives itch best consistency.
Ways to use homemade pesto:
- Creamy Pesto Pasta with Chicken
- Breakfast Pizza with Basil Pesto
- Pesto Chicken Meatball Soup
- Secret Ingredient Tomato Basil Soup
- Pesto Baked Chicken with Tomatoes

Homemade Basil Pesto
Ingredients
- 3 cups fresh basil leaves slightly packed
- ⅓ cup grated parmesan cheese freshly grated is best
- 2 cloves garlic
- 1 teaspoon lemon zest
- ¼ cup toasted pine nuts see notes
- 2 teaspoons lemon juice
- ½ cup olive oil
- pinch of red pepper flakes optional
Instructions
- LOAD IT: Add the basil leaves, parmesan cheese, minced galric, lemon zest, pine nuts, lemon juice and, if using, red pepper flakes to a blender or food processor.
- BLITZ IT: Blend continuously until the ingredients start to breakdown. If you prefer a more coarse pesto, use the pulse setting. Stream in the olive oil and allow the ingredients to emulsify with the oil. You want to continue processing until the oil is combined with the basil and your other ingredients.
- TASTE: the pesto, add additional garlic, salt, or parmesan to preference.
- STORING: Store the pesto in a small container (where the pesto fits all the way to the top and press to reduce air pockets. Homemade pesto can be stored in the refrigerator for up to 1 week.
- FREEZE: You can also pour the pesto into ice cube trays and freeze. Remember to transfer the frozen pesto to a zip top bag once frozen.
Notes
- You can replace the pine nuts with cashews, pistachios, walnuts, pumpkin seeds, or almonds for a more economical option.
Nutrition
Nutrition information is automatically calculated, so should only be used as an approximation.
Like This? Leave a comment & rating below!


Delicious…………………Love this recipe
Loved this recipe. But I did tweak it a bit by adding another clove of garlic, adding a little more olive oil to give it a smoother consistency, and a small pinch of Maldon flaked salt. Yummy!!!
I’ve made this several times now. It is the best!!
Mm so yummy
mmm, best pesto I ever had.
I am making this today. Can’t wait. Do you have a recipe for the pizza pictured above?? Looks delicious!
Glad to hear you’ll be making the pesto! Here’s the recipe for the breakfast pizza above 🙂
We love it….can’t wait to make it again. Have you ever put cream in it? You’re right – the lemon juice and zest make it just absolutely wonderful!
I haven’t tried it with cream but I can’t imagine that that would make it taste bad 😉
Salt and pepper? I’m assuming to taste, but i also use nutritional yeast instead of Parm so maybe the cheese is salty enough…
Yes, that’s correct – it’s to taste, as parmesan varies so greatly in saltiness. I suggest tasting the pesto with the nutritional yeast and adjusting with salt and pepper to preference.
Hello there! I have everything for this recipe…except the food processor ? I haven’t yet bought another one since mine broke. Could I use my blender or Nutribullet?
Both your Nutribullet and blender will work! Just be sure to ‘pulse’ rather than blend until it reaches a pesto consistency! 🙂
This recipe is so simple to make and really delicious! Adding the red pepper flakes really put this basic recipe over the top!
Very good, except be sure to use sweet basil and you can cut down on the olive oil if you want it a little pastier.
Absolutely best ever Basil Pesto and Sundried Tomato Pesto ever. Did’nt change a thing.
Have past your site on to my friends. Thankyou
Can I please have the recipe for that yummy pasta salad pic posted above? I didn’t see a link. Thanks!
Hi Anita! Glad to her you’d like to give the pasta salad a try! Here’s a link.
Absolutely gorgeous pesto! Thanks for the recipe. Definitely saving! 🙂
Does the minced garlic go in raw? I didn’t see anything about sautéing it first. Just making sure.
Yes, it goes in raw.
I freeze this every year. Just add some olive oil on top before sealing it so it doesn’t turn brown. Lasts until the next season when I do it all over again. Also, I use toasted walnuts. Works great.
Since pine nuts are expensive, I’ve used salted roasted sunflower seeds, and it’s turned out great!
Great idea, thanks for sharing Christa!
Can this recipe be canned?
Unfortunately I don’t have much experience with canning, please use your best judgement.
I freeze it in ice cube trays then put in freezer bags. I pesto cube is about a tablespoon.
Great idea, Carol! Thanks for sharing! 🙂
yummy, this recipe tasted perfect. Great recipe. Thanks for sharing.
Simon
Glad to hear you enjoyed it, thanks Simon!
Did I miss the notes part on the pine nuts?
Nope, I did. Thanks for catching that! I’ve added it in 🙂